Cora's Lineup Decisions: Red Sox Game 1 Doubleheader

Table of Contents
Assessing the Offensive Approach in Game 1
Cora's offensive strategy in Game 1 of the doubleheader was a key aspect of his overall plan. Let's examine his decisions, both at the top and bottom of the lineup.
Evaluating the Top of the Order
The top three spots in the batting order are crucial for setting the tone of the game. Cora's choices here revealed a specific strategic approach.
- Leadoff Hitter: [Insert Player Name] – Known for his high on-base percentage (.350 OBP in the last 15 games), [Player Name]’s placement aimed to get on base frequently, setting up scoring opportunities for the power hitters behind him.
- Second Hitter: [Insert Player Name] – A contact hitter with speed, [Player Name]’s role was to advance runners and potentially manufacture runs. His .280 batting average against right-handed pitching made him an ideal choice in this spot.
- Third Hitter: [Insert Player Name] – The team's cleanup hitter, [Player Name]’s high slugging percentage (.520 in the last month) suggests a focus on driving in runs. His power hitting was strategically placed to capitalize on runners reaching base.
The benefits of this approach are clear: a potent combination of on-base skills, speed, and power. However, a potential drawback is the reliance on [Player Name]'s ability to consistently reach base. A cold streak could impact the team’s overall offensive performance.
Analyzing the Middle and Bottom of the Lineup
The middle and bottom of the lineup play a vital supporting role, offering both power and contact hitting.
- Middle Infielders: The middle infielders were strategically placed to provide both run production and defensive stability.
- Bottom of the Lineup: Players at the bottom featured a mix of contact hitters and players with developing power potential. Their roles focused on extending innings and providing opportunities for the top of the lineup to score.
This balance between power and contact attempts to create a consistent offensive threat throughout the game, minimizing opportunities for the opposing team to easily navigate through the lineup.
Defensive Considerations and Positional Choices
Cora's lineup choices were not solely focused on offense; defensive positioning played a significant role.
Starting Lineup Defensive Positioning
Cora’s defensive lineup was built around strong defensive capabilities at key positions.
- Shortstop: [Insert Player Name] showcased his exceptional range and arm strength, minimizing potential base hits.
- Center Field: [Insert Player Name]'s speed and range covered significant ground, securing potential fly balls.
These defensive choices reflect Cora’s emphasis on preventing runs as well as scoring them. There were no major positional surprises, indicating a commitment to proven defensive capabilities.
Potential Pinch-Hitting and Defensive Replacements
Late-game substitutions are always a possibility.
- Pinch Hitting: [Insert Player Name], known for his power hitting against specific pitchers, was a likely pinch-hitting option in crucial situations.
- Defensive Replacements: Defensive replacements were likely to be used based on late-game situations and the opposing team's batting lineup. A speedier outfielder might replace a less mobile player for a late-game scenario.
These potential substitutions would hinge on the game situation, further highlighting Cora's flexible and data-driven approach.
The Impact of Injuries and Player Form
Player performance and injuries significantly influenced Cora’s lineup decisions.
Influence of Recent Player Performance
Recent form had a substantial impact.
- [Insert Player Name]'s recent hot streak resulted in a higher placement in the batting order.
- Conversely, [Insert Player Name]'s recent struggles led to a lower batting position to minimize pressure.
Addressing Injuries and Their Impact
Injuries played a role in shaping the lineup.
- [Insert Player Name]'s injury forced a lineup reshuffle, placing [Insert Player Name] in a more prominent position.
- The absence of [Insert Player Name] necessitated a strategic shift in the defense and batting order.
These adjustments highlight Cora's adaptability in managing unforeseen challenges and optimizing the remaining players' potential.
Conclusion
Alex Cora's lineup decisions for the Red Sox Game 1 doubleheader demonstrated a thoughtful strategy considering offense, defense, player form, and injuries. His emphasis on a balanced lineup with a strong top order, coupled with attention to defensive positioning, reflects a data-driven approach. While the success of his strategy can only be fully assessed after the game, his ability to adapt to recent performances and injuries was apparent. What are your thoughts on Cora's lineup decisions in the Red Sox Game 1 doubleheader? Discuss Cora's lineup strategy and analyze Cora's Red Sox Game 1 lineup choices in the comments below!
Featured Posts
-
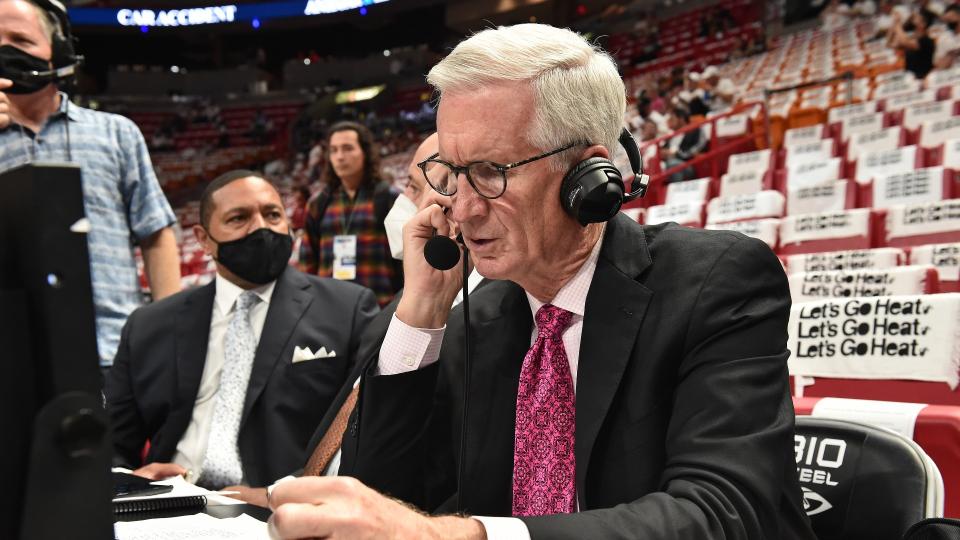 Mike Breen Names Marv Albert The Greatest Basketball Announcer
Apr 28, 2025
Mike Breen Names Marv Albert The Greatest Basketball Announcer
Apr 28, 2025 -
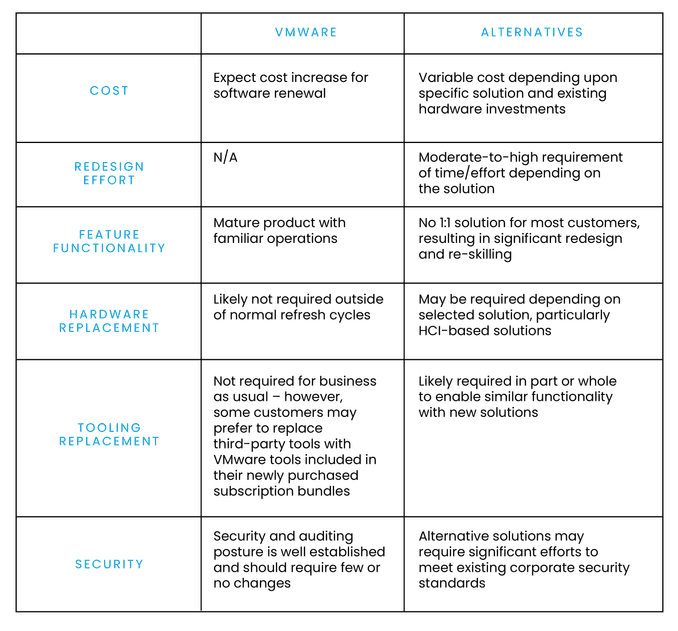 Broadcoms V Mware Acquisition A 1050 Price Spike For At And T
Apr 28, 2025
Broadcoms V Mware Acquisition A 1050 Price Spike For At And T
Apr 28, 2025 -
 Assessing The Damage The Economic Impact Of A Canadian Travel Boycott On The Us
Apr 28, 2025
Assessing The Damage The Economic Impact Of A Canadian Travel Boycott On The Us
Apr 28, 2025 -
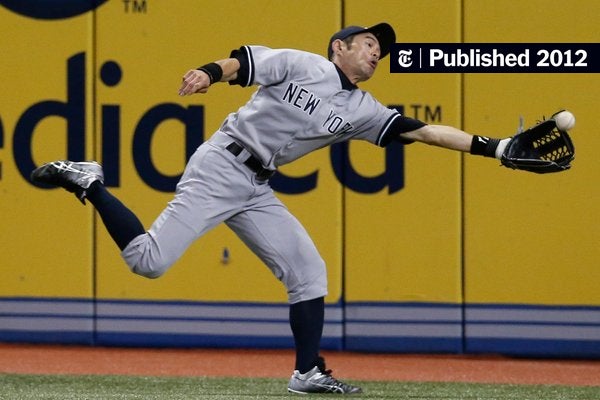 Yankees Rally Past Astros Rodon Leads The Charge
Apr 28, 2025
Yankees Rally Past Astros Rodon Leads The Charge
Apr 28, 2025 -
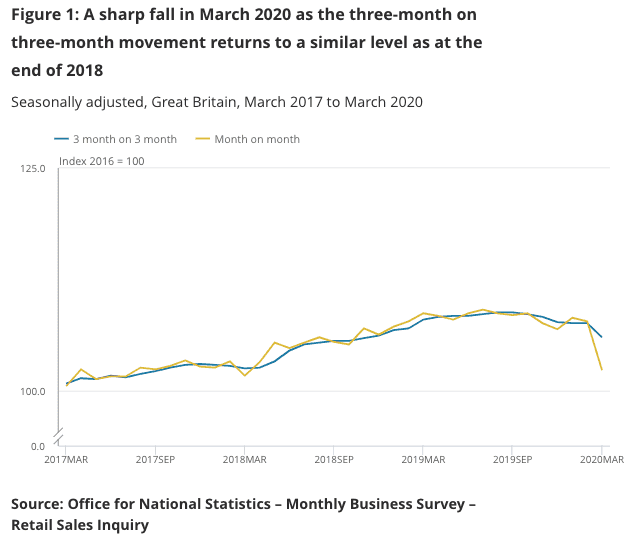 Retail Sales Slump Could The Bank Of Canada Reverse Rate Hikes
Apr 28, 2025
Retail Sales Slump Could The Bank Of Canada Reverse Rate Hikes
Apr 28, 2025
Latest Posts
-
 Mike Breen On Marv Albert A Discussion On The Greatest Basketball Announcer
Apr 28, 2025
Mike Breen On Marv Albert A Discussion On The Greatest Basketball Announcer
Apr 28, 2025 -
 Is Marv Albert The Greatest Basketball Announcer Mike Breen Weighs In
Apr 28, 2025
Is Marv Albert The Greatest Basketball Announcer Mike Breen Weighs In
Apr 28, 2025 -
Mike Breen Names Marv Albert The Greatest Basketball Announcer
Apr 28, 2025
-
 Le Bron James On Richard Jeffersons Espn Comments
Apr 28, 2025
Le Bron James On Richard Jeffersons Espn Comments
Apr 28, 2025 -
 Le Bron James Reaction To Richard Jeffersons Espn News Segment
Apr 28, 2025
Le Bron James Reaction To Richard Jeffersons Espn News Segment
Apr 28, 2025

